Volumes not meshing

Dear Forum,

I have built an assembly in Solidworks and saved it as a .stp file. Before I exported, I used an interference check in Solidworks. I then import the .stp file into Cubit. The import appears to work fine and the assembly looks correct. It is a simple assembly with 8-parts (volumes) in Cubit. I have read that the first thing to do is the following:

imprint all
merge all

I then proceed to mesh the volumes. However, two of the volumes do not mesh. One of the volumes is very thin and I can see that not meshing. However, the other volume does not mesh. My question is the following:

1: What more can I check (either in Solidworks or Cubit) to see if a volume will not mesh?
2: Is there a tutorial that walks through how to mesh volumes with examples?

Thank you.
Chad F

Hi @ChadJames,
before imprinting and merging you often have to defeature and decompose volumes to get a geometry that can be meshed.
On our website we have some tutorials and training material to get you into the cubit workflow. This takes some time but is definitely worth it.

Can you share your geometry that you are trying to mesh?

Dear Norbert,

Thank you for the response. One thing that did work was switching to tet for meshing. I did get the following message.

WARNING: >>>>Poor Quality Shape Tet Generated!<<<< on Volume 5 ( Cut-Extrude1 Cut_Extrude1 )
(For example, the Shape metric for Tet 257170 is 0.0805587 .)
The threshold for a Tet is 0.2

I would be happy to send my .stp file. Will that work?

Yes the .stp that you import in cubit should be fine.

Can I email it to you?

Hi, I am also confused on how to set the density. Here is what I get. Do you see something wrong? The density is not correct.

Cubit>Create Material 1 Name ‘Plastic - 100’ Density ‘1.032’

Created material 1.

Finished Command: create material 1 name “Plastic - 100” density “1.032”

Cubit>list material 1

Material 1
Material Name: Plastic - 100
Property Group: CUBIT-FEA

MODULUS:  
SHEAR_MODULUS:  
POISSON:  
DENSITY:  1.79769313e+308
SPECIFIC_HEAT:  
CONDUCTIVITY:  
THERMAL_EXPANSION:  
YIELD_STRENGTH:  
ULTIMATE_STRENGTH:  
ULTIMATE_STRAIN:  
USER_CONSTANTS:  

Finished Command: list material 1

Please use https://transfer.coreform.com/ and post the link afterwards.

Your input for the density is a string and not a number. don’t use " or ’ if you want to input a number.
e.g. create material name "test" density 1e6

                    # Upload from web
                    Drag your files here, or  click to browse.
                

https://transfer.coreform.com/KXlQTSlhzo/HPGe_assm_2_7_mm.STEP

Please let me know if you get it. Thanks for the fix. Density is correct now.

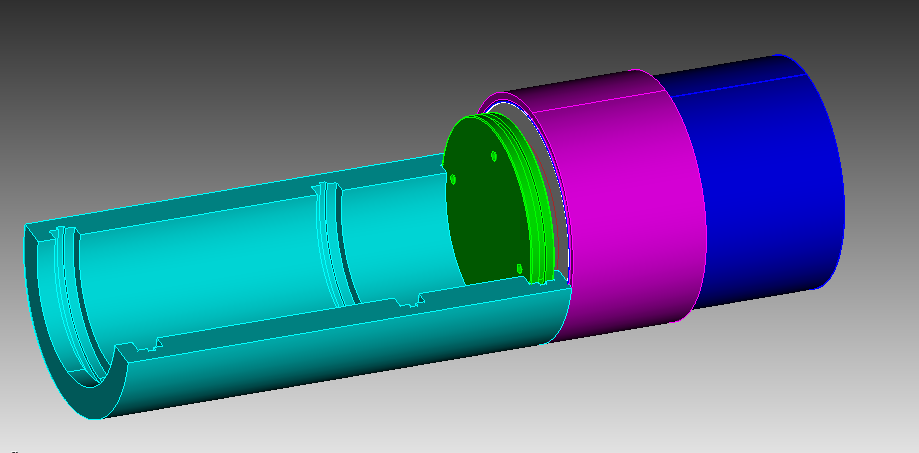
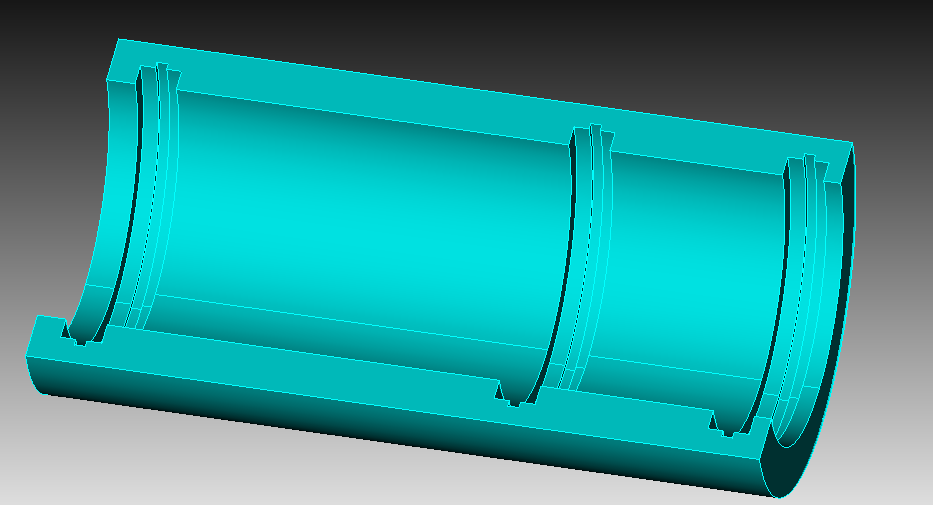
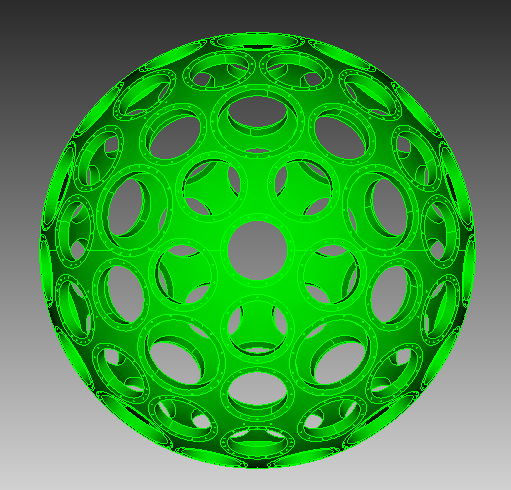
I got your geometry.

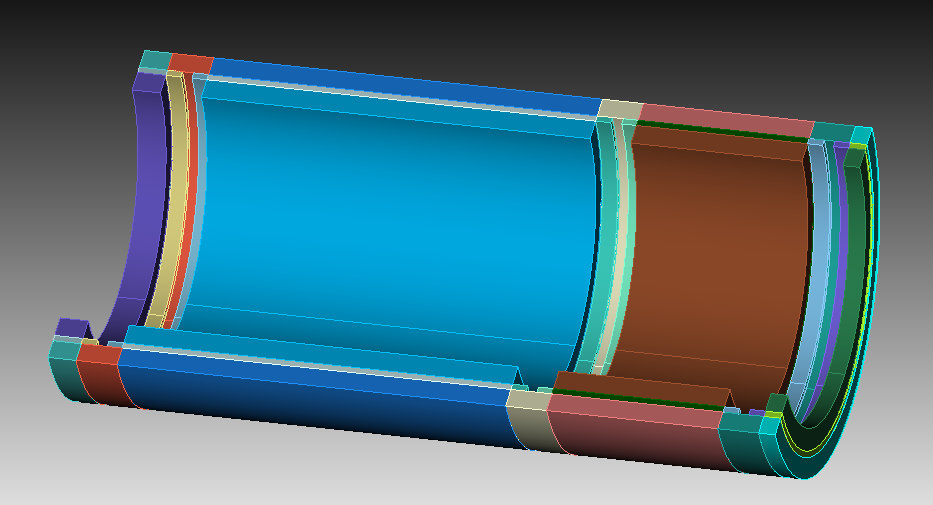
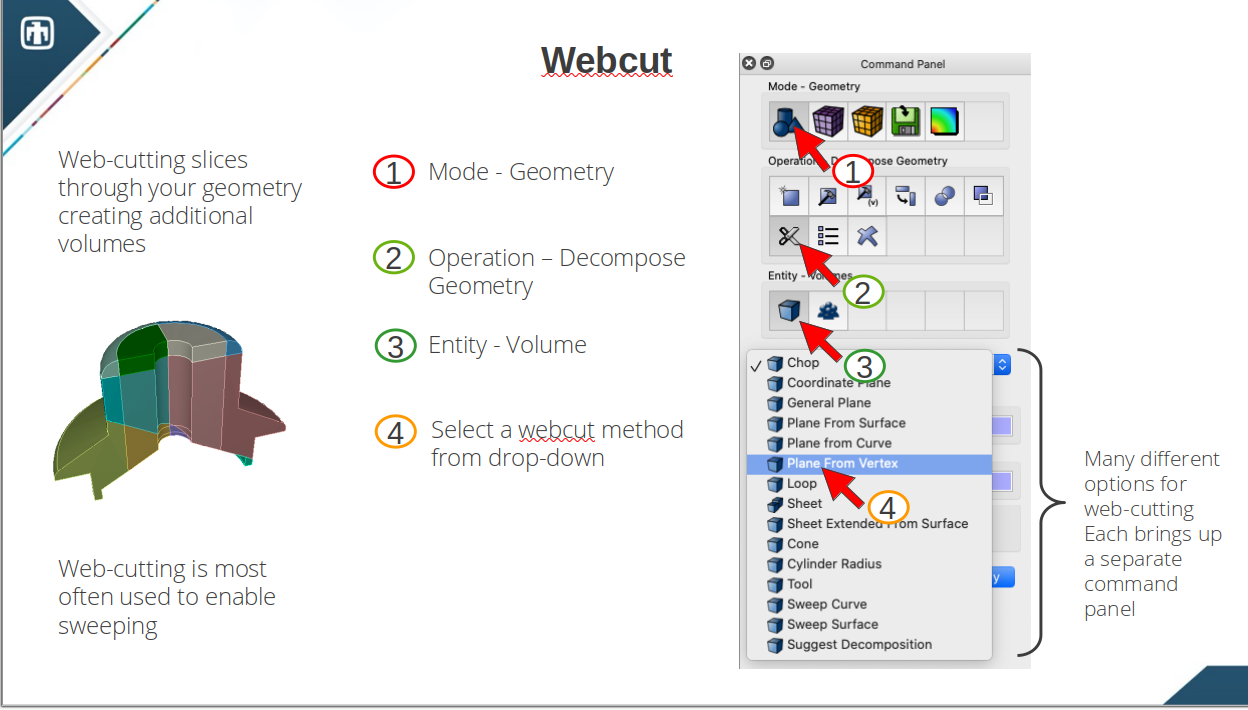
I took an attempt to mesh it. First i put each of your volumes into a block because i will decompose them with webcuts a lot to get some usefull symmetry for meshing. I could either handpick them or write a short python loop for it.

#!cubit
reset
import step "/home/user/Downloads/HPGe_assm_2_7_mm.STEP" heal

#!python
vids = cubit.parse_cubit_list("volume","all")
i = 1
for id in vids:
 cubit.cmd(f"block {i} add  volume {id}")
 i=i+1
print("finished")

First i will make a webcut on volume 6

webcut volume 6  with sheet extended from surface 114 113

next is volume 1. We will decompose again using webcuts and defeature the chamfers.

webcut volume 1  sweep surface 23  perpendicular inward through_all 
webcut volume 1  sweep surface 21  perpendicular inward through_all 
webcut volume 1 with sheet extended from surface 10  
remove surface 8, 19 connected_sets
remove surface 7, 20 connected_sets

On volume 2 we first remove the sink holes before doing the webcut.

remove surface 30, 32, 34, 36, 43, 45, 47, 49 connected_sets
webcut volume 2  with sheet extended from surface 29 50  

Volume 4 will be cut down quite a lot but i don’t have to worry about skewed elements for this part.

webcut volume 4  with sheet extended from surface 100 59  
webcut volume 4  with sheet extended from surface 77 70  
webcut volume 19 4  with sheet extended from surface 82  
webcut volume 21 4  with sheet extended from surface 81  
webcut volume 21 4  with sheet extended from surface 85  
webcut volume 20 4  with sheet extended from surface 84  
webcut volume 20 4  with sheet extended from surface 88  
webcut volume 22 4  with sheet extended from surface 87 


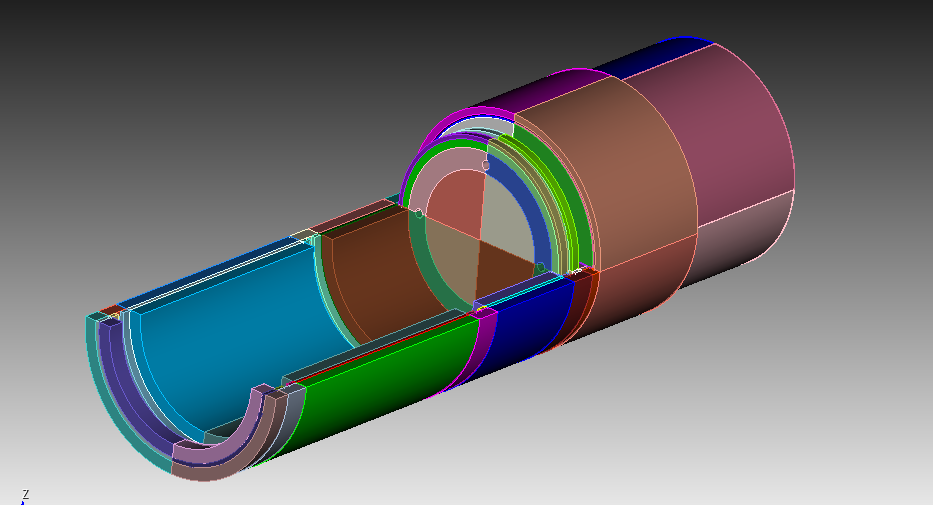
Then i can make webcuts in x and z plane through all volumes. This is just to force more symmetry on the mesh. Then we can imprint and merge.

webcut volume all with plane zplane offset 0 
webcut volume all with plane xplane offset 0 

imprint vol all
merge vol all

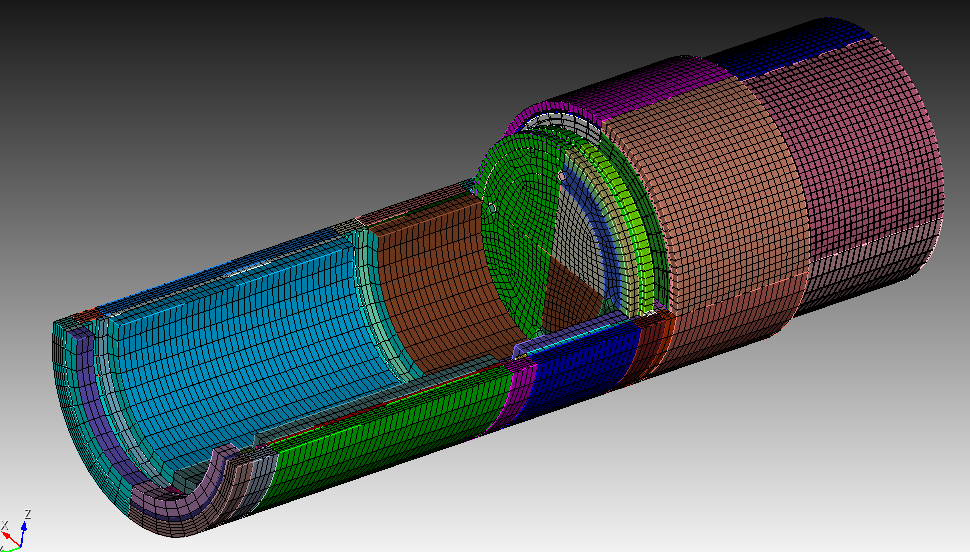
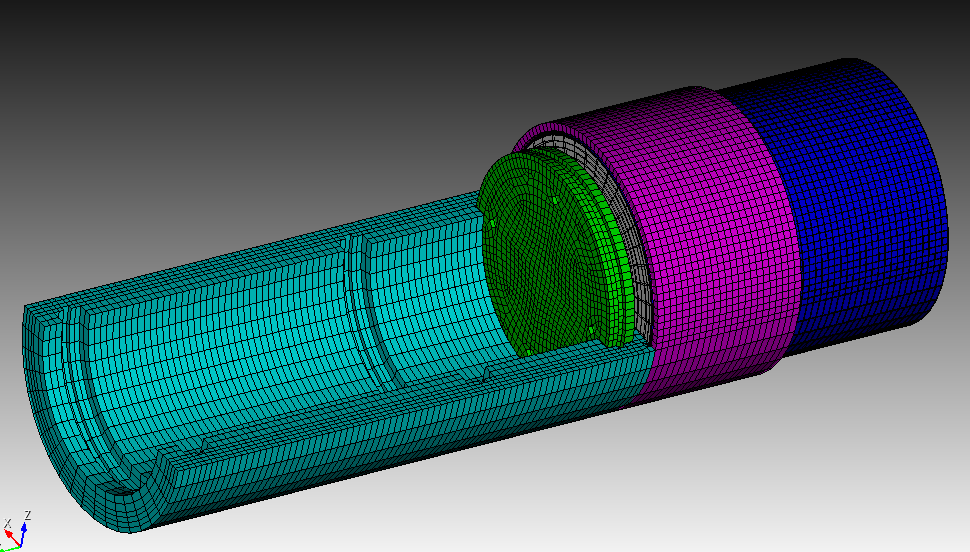
Then we can already set a desired mesh size and mesh.

vol all size auto factor 4
mesh vol all

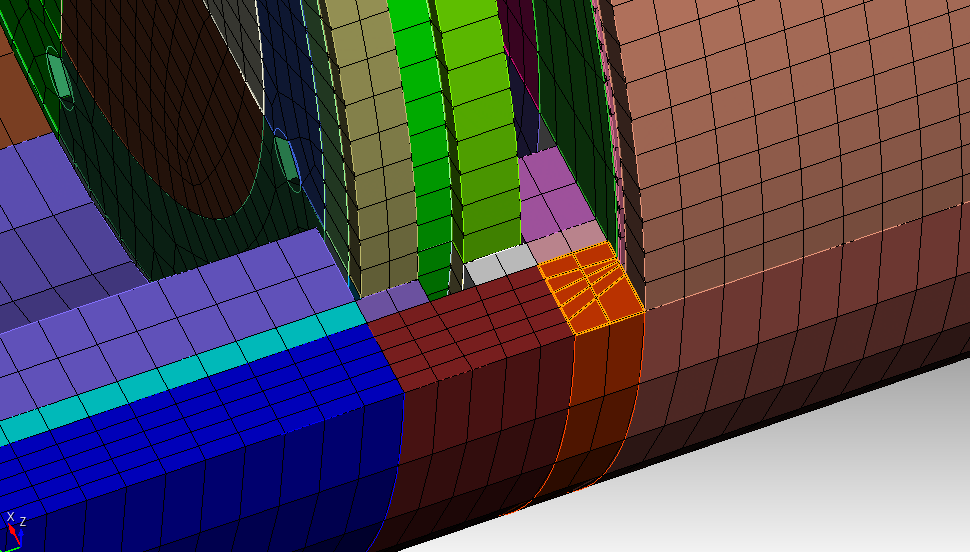
I am not really happy with the shape of the elements here.

So i will try to set the pave scheme for this surface and run the whole journal again.

#!cubit
reset
import step "/home/user/Downloads/HPGe_assm_2_7_mm.STEP" heal

#!python
vids = cubit.parse_cubit_list("volume","all")
i = 1
for id in vids:
 cubit.cmd(f"block {i} add  volume {id}")
 i=i+1
print("finished")

#!cubit

webcut volume 6  with sheet extended from surface 114 113

draw vol 1
webcut volume 1  sweep surface 23  perpendicular inward through_all 
webcut volume 1  sweep surface 21  perpendicular inward through_all 
webcut volume 1 with sheet extended from surface 10  
remove surface 8, 19 connected_sets
remove surface 7, 20 connected_sets

draw vol 2
remove surface 30, 32, 34, 36, 43, 45, 47, 49 connected_sets
webcut volume 2  with sheet extended from surface 29 50  


draw vol 4

webcut volume 4  with sheet extended from surface 100 59  
webcut volume 4  with sheet extended from surface 77 70  
webcut volume 19 4  with sheet extended from surface 82  
webcut volume 21 4  with sheet extended from surface 81  
webcut volume 21 4  with sheet extended from surface 85  
webcut volume 20 4  with sheet extended from surface 84  
webcut volume 20 4  with sheet extended from surface 88  
webcut volume 22 4  with sheet extended from surface 87  

webcut volume all with plane zplane offset 0 
webcut volume all with plane xplane offset 0 

imprint vol all
merge vol all

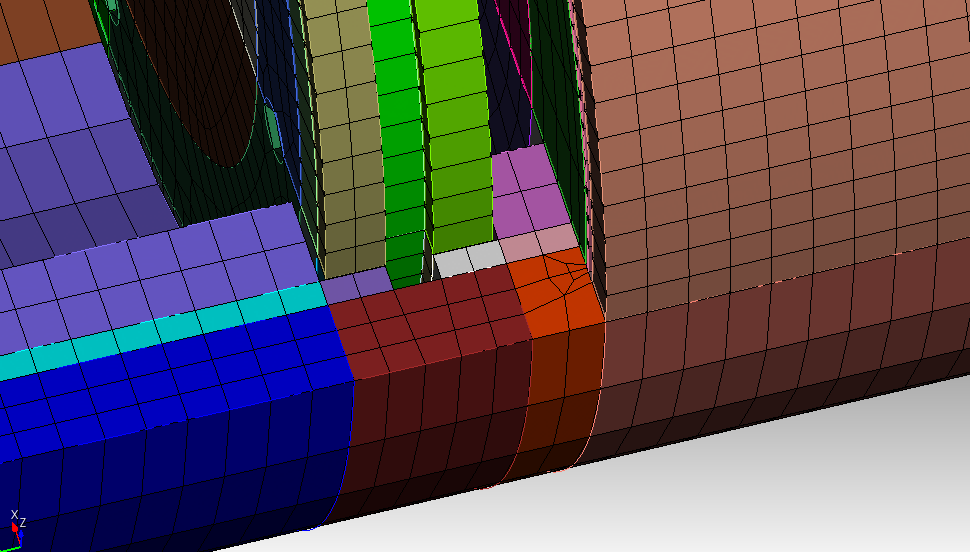
Surface 308 scheme pave
vol all size auto factor 4
mesh vol all

I hope this gives you some ideas how you could handle such geometries.

As we put all our starting volumes into blocks in the beginning you can now draw them with draw block all

Also for export the base volumes are now already assigned to an element set.

Hi Norbert,
Yes. This is very informative. I have a few questions.

1: What is webcut?
2: From your post it looks like you can run python code in the terminal of Cubit? Is that correct? Where does cubit.parse_cubit_list come from
3: Have you ever imported these UM into MCNP?

Thank you.

1:
Webcuts are the main tool for decomposing the geometry into smaller meshable parts. Basically it creates cutting planes to slice down the geometry. Please take a look into our tutorials and training material.

2:
Yes, you can switch between cubit and python in the command line window. Either with #!cubit and #!python or with the buttons on the bottom left. It is easier to use the journal editor to build scripts.

You can find the available Methods for the Python API in the documentation.

If you want to create something more than a python script you will need the SDK and C++.

3: No. I don’t really have any experience using MCNP.